We use a scripting language called Lua, which has been extended to provide functionality specific to the Pharos Controllers. Tutorials and reference manuals for the Lua language can be found at www.lua.org. We will not attempt to document the Lua language here, but just the Pharos specific extensions. Please contact support if you need assistance with preparing a script or if you would like some examples as a starting point.
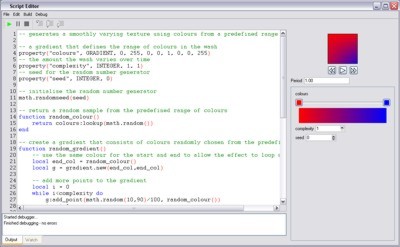
The Lua Script Editor allows you to edit scripts from Triggers Conditions and Actions, and Custom presets within Designer. The Script Editor is launched by pressing the Launch Editor button in the trigger properties:
The main area of the editor is the code editor where you enter the source code of the script. The code editor will colour the Lua syntax to aid readability. Standard clipboards shortcuts and undo/redo are supported.
To import a Lua script from an external file, use File > Import (Ctrl+I).
To save a Lua script to a file, use File > Export (Ctrl+E).
To compile the script and check for syntax errors, use Build > Build (F7). If there are errors in the script, they will be displayed at the bottom of the window.
When you have finished editing the script, press Ok to close the Script Editor. If there are still errors in your script, you will be prompted whether the invalid source should be saved or not.
To discard any changes close the Script Editor and select Discard from the confirmation dialog.
If your script contains no errors, use Debug > Run (F5) to execute it in a debugger. This will run the script and report any runtime errors in the Output tab below the source editor. Note that only Custom preset scripts can be executed in the debugger.
If there are errors, you can place breakpoints in the source to force the debugger to halt execution at that point and allow you to examine the state of variables and execute further instructions one at a time.
To add/remove a breakpoint on a line of source code, click the mouse to the left of the relevant line number, or use Debug > Toggle Breakpoint (F9) to set a breakpoint at the text cursor. Now, when you run the script with Debug > Run (F5), the debugger will halt at the first breakpoint that it encounters.
When the debugger is halted, you can examine the values of variable in the script in the Watch tab below the source editor.
| realtime.year | The year |
| realtime.month | The month (1 to 12) |
| realtime.monthday | The day of the month (1 to 31) |
| realtime.weekday | The day of the week (0 = Sunday; 1 = Monday; etc.) |
| realtime.hour | The hour (0-23) |
| realtime.minute | The minute (0-59) |
| realtime.second | The second (0-59) |
NOTE: The location of the Controller must be set correctly in project properties for these to return the correct values.
| sunrise.hour | The hour of sunrise (0-23) |
| sunrise.minute | The minute of sunrise (0-59) |
| sunrise.second | The second of sunrise (0-59) |
| sunset.hour | The hour of sunset (0-23) |
| sunset.minute | The minute of sunset (0-59) |
| sunset.second | The second of sunset (0-59) |
NOTE: The location of the Controller must be set correctly in project properties for these to return the correct values.
| civil_dawn.hour | The hour of civil dawn (0-23) |
| civil_dawn.minute | The minute of civil dawn (0-59) |
| civil_dawn.second | The second of civil dawn (0-59) |
| civil_dusk.hour | The hour of civil dusk (0-23) |
| civil_dusk.minute | The minute of civil dusk (0-59) |
| civil_dusk.second | The second of civil dusk (0-59) |
| nautical_dawn.hour | The hour of nautical dawn (0-23) |
| nautical_dawn.minute | The minute of nautical dawn (0-59) |
| nautical_dawn.second | The second of nautical dawn (0-59) |
| nautical_dusk.hour | The hour of nautical dusk (0-23) |
| nautical_dusk.minute | The minute of nautical dusk (0-59) |
| nautical_dusk.second | The second of nautical dusk (0-59) |
NOTE: The location of the Controller must be set correctly in project properties for these to return the correct values.
These are only executed on the local Controller, which must be a TPC.
| set_control_value(controlKey, valueIndex, value) | Sets the value of the TPC control. Control key is a string, e.g. "slider002". Value index 1 for sliders or 1, 2 or 3 for colour pickers |
| set_control_value(controlKey, value) | Shorthand form with value index equal to 1, useful for sliders. Control key is a string, e.g. "slider002" |
| set_control_state(controlKey, stateName) |
Provide feedback by changing the appearance of a control. Control key is a string, e.g. "slider002".+ |
| set_control_caption(controlKey, value) | Provide feedback by changing the caption of a control. Control key is a string, e.g. "button002". |
| set_page(pageName) | Change the current page of the user interface |
| set_locked(lock) | Lock or unlock the TPC (lock: true of false) |
| set_enabled(enable) | Enable or disable the user interface (enable: true of false) |
| digital[index] | Boolean value on input (index 1 to 8) |
| DMXIN[channel] | The value of the specified channel (1 to 512) |
| get_dmxin(x) | Returns a DMXIN object for port (x is 1 or 2) |
| get_controller_number() | Returns the number of this Controller |
| is_timeline_running(num) | Is timeline with specified user number between start and end time? |
| is_timeline_onstage(num) | Is timeline with specified user number actually in control of fixtures on this Controller? |
Equivalent to clicking a trigger in the web control screen.
| inject_trigger(num) | Fires the trigger with the specified number. Additional arguments are passed as variables. |
Note that unlike a normal trigger action these will only affect the local Controller. This can be a powerful additional feature in certain situations. If you want to fire a timeline system-wide then inject an appropriate trigger.
| start_timeline(num) | Start timeline with the specified user number |
| stop_timeline(num, time) | Stop timeline with the specified user number with optional fade time (in seconds) |
| halt_timeline(num) | Halt timeline with the specified user number |
| resume_timeline(num) | Resume timeline with the specified user number |
| stop_all() | Stop all timelines |
| set_timecode_source_enabled(source, [enabled]) | Enable or disable a timecode source (source is one of TCODE_1, TCODE_2, TCODE_3, TCODE_4, TCODE_5, TCODE_6, AUDIO_1, AUDIO_2, AUDIO_3, AUDIO_4; enabled assumed true if not specified) |
| set_timecode_source(timeline_num, source, [offset]) | Set the current timecode source for a timeline (source is one of DEFAULT, TCODE_1, TCODE_2, TCODE_3, TCODE_4, TCODE_5, TCODE_6;offset in msecs, assumed 0 if not specified) |
| set_timecode_source(timeline_num, source, band, channel, [peak]) | Set the current audio source for a timeline (source is one of AUDIO_1, AUDIO_2, AUDIO_3, AUDIO_4; band can be any number or VOLUME; channel is one of LEFT, RIGHT, COMBINED; peak is optional, assumed false if not specified) |
A script can directly control fixtures as if it was a high priority timeline. It can only control fixtures local to the Controller on which the script is running. It can also only control whole fixtures – there is no access to individual elements of compound fixtures.
| set_intensity(fixture, value, time) | Set intensity on fixture to value (as DMX). Optionally give a time (in seconds) to fade. |
| set_red(fixture, value, time) | Set red on fixture to value (as DMX). Optionally give a time (in seconds) to fade. |
| set_green(fixture, value, time) | Set green on fixture to value (as DMX). Optionally give a time (in seconds) to fade. |
| set_blue(fixture, value, time) | Set blue on fixture to value (as DMX). Optionally give a time (in seconds) to fade. |
| clear_fixture(fixture, time) | Clear the direct settings on fixture with optional fade time (in seconds). |
| clear_all(time) | Clear all direct settings with optional fade time. |
| DMXOUT[channel] | The value of the specified channel (1 to 512) |
| get_dmxout(universe) |
Returns a DMXOUT object for universe (see table below) |
| park(universe, channel, value) | Park the specified channel (1-512) on universe (see table below) at value (0-255). |
| unpark(universe, channel) | Unpark the specified channel (1-512) on universe (see table below). |
The value for the universe argument for both of the above functions depends on the protocol type:
| LPC 1's DMX | Universe = 1. |
| LPC 2's DMX | Universe = 1 or 2. |
| Controller's Art-Net II | Universe = ARTNET+<Art-Net II universe number>. |
| Controller's Pathport | Universe = PATHPORT+<Pathport universe number>. |
| Controller's sACN | Universe = SACN+<sACN universe number>. |
| Controller's KiNet | Universe is obtained using the get_kinet_universe(powerSupplyNum, portNum) function. |
For example:
| park(ARTNET+2, 1, 255) | Parks channel 1 of Art-Net II universe 2 at full. |
| park(ARTNET, 2, 128) | Parks channel 2 of Art-Net II universe 0 at 50%. |
| park(SACN+1, 1, 255) | Parks channel 1 of sACN universe 1 at full. |
| park(get_kinet_universe(2, 15), 1, 255) | Parks channel 1 of port 15 of KiNet power supply 2 at full. |
| get_rio(type, number) | Returns as an object the RIO by type (RIO_80, RIO_44 or RIO_08) and number. |
| rio[input] | Boolean value on input (1 to 8) of the returned RIO object. |
For example:
myRIO = get_rio(RIO_80, 2)

rioInput1 = myRIO[1]
| get_bps(number) | Returns as an object the BPS by number. |
| bps:get_state(button) |
State of the button (1 to 8) of the returned BPS object, values are RELEASED, PRESSED, HELD or REPEAT. |
| bps:set_LED(button, effect, intensity, fade) | Sets the button (1 to 8) of the returned BPS object, effect can be OFF, STATIC, SLOW_FLASH, FAST_FLASH, DOUBLE_FLASH, BLINK, PULSE, SINGLE, RAMP_ON or RAMP_OFF. Intensity is optional and should be between 0 and 255, if not specified, the LED intensity is left unchanged from its current value. If intensity is specified, fade can also optionally be specified and should be between 0s and 25.4s. |
For example:
myBPS = get_bps(1)

if (myBPS:get_state(2) == HELD) then

    mpBPS:set_LED(2, FAST_FLASH, 255, 0.5)

end
The variable must have been captured by the trigger running the script.
| variable[index] | Value of variable with given index |
| log(“string”) | Writes string into the log |
Using a Lua script it is possible to store data as a file on the memory card. Unlike variables in memory, data stored to a file will not be affected by resetting the Controller or cycling the power. The file can be read back at any time to access the data. This can be very useful in show control situations where some system status information needs to be stored persistently even if the Controller is reset. Alternatively it can allow you to store large data tables on the memory card and only read the data when it is needed.
To work with files on the memory card use the standard I/O library functions described in the Lua documentation. When writing to a file always close the file explicitly to make sure your data is correctly stored. The full file path to a file on the memory card differs per Controller, so we have provided a function to create the full file path for you:
| get_resource_path("my_file") | Returns the full file path for the given file name. |
For example:
file = io.open(get_resource_path("myfile"), "r")

if (file ~= nil) then

    local line = file:read()

    file:close()

end